Tuesday, August 26, 2014

Buttermilk Pancakes


Buttermilk pancakes are better than regular pancakes.

These are the ingredients:


Of course, as with all my posts, you don't have to use the gluten free flour unless you have a gluten free wife.

Mix 2 cups of flour with 2 tablespoons of sugar, 1 teaspoon baking powder, 1/2 teaspoon baking soda, & 1/2 teaspoon salt.


In the next bowl, mix 2 eggs, 2 cups buttermilk,  & 1/4 cup sour cream.
Also melt about 4 tablespoons of butter in a bowl.


Mix the ingredients in each bowl until well combined.  Once the butter has cooled, add it to the buttermilk mixture.

 Then make a well in the center of the flour mixture and pour in the buttermilk mixture.  Gently stir only until combined.

Let the mixture sit for about ten minutes before cooking.

Heat a skillet on the stove and use a small amount of vegetable oil to grease skillet.
Drop small spoonfuls of batter onto the pan.  Let the pancake cook until you see many bubbles forming on the pancake, then flip.
Repeat with all of the batter.  I turn the stove on 250 degrees and line a baking sheet with aluminum foil. Then I place the pancakes in the oven to keep them warm until all the pancakes are made.

See that, the batter should be lumpy. Don't worry about the lumps, they go away when it is cooking.

Then once the pancakes are done, add butter.

And serve...

French Toast


I thought perhaps there was no point in creating this blog post, because everyone knows how to make French Toast, right!?  Wrong.  My wife doesn't know how to make French Toast and I guess she probably isn't the only one.  So here is a guide.

The basics: Sugar, egg, milk, cinnamon, and bread.


Start by cracking two eggs into a bowl.


Next,  add sugar.  How much you would like to add is completely up to you.  My mother taught me that the more sugar, the better the French Toast!


Then add milk.  Not a lot, just enough to make it kind of liquidy so you can dip the bread in it and it will have something to soak up.


Then slice up the bread. I think it is best with slick slices - so at least an inch to an inch and a half.


Dip the bread into the egg mixture.  And then turn over and dip the other side.  Don't let the bread sit in the mixture too long. You don't want it to get soggy, just dip then turn, then dip and remove.  Place bread in skillet with cooking grease of your choice.  I prefer to use some bacon grease from the bacon I cooked earlier in the morning and maybe a little crisco.


 Cook on low heat so it has time to actually cook all the way through.  You want it to get nice and golden brown or even a little dark brown in a few places.  Flip and cook on the other side...


Remove to a plate.  Top with butter.


And then serve with powdered sugar and fresh fruit.  Never ever serve with syrup.  Syrup is for pancakes.  French toast deserves the good stuff!


Monday, August 25, 2014

Parmesan Garlic Wings


Delicious Parmesan Garlic Wings.....This is what we do on our vacation from work. We make incredibly unhealthy but delicious food.

To start you'll need fresh Parmesan,garlic, basil, oregano, lemon, olive oil, butter, flour, cumin, salt, pepper, and of course - chicken wings.  If you don't currently use fresh parmesan when cooking, I suggest you start.  It is so tasty and makes all the difference.

Start by making a light batter.  Mix some flour with a little bit of cumin, salt, and pepper.  Just enough to taste. Also, add a little ground cayenne if you like some spice.


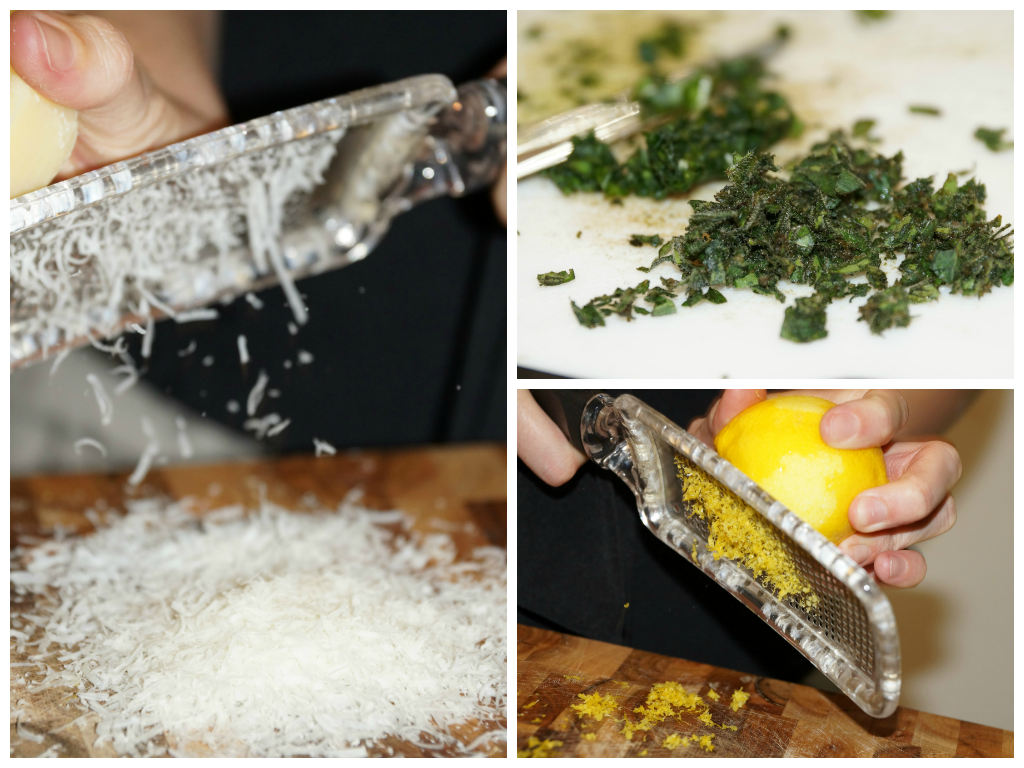
Next, prepare the ingredients for the sauce.  Finely chop some oregano and some basil.  Zest a lemon.  Grate the Parmesan.

I don't have measurements for any of this.  Put as much of each ingredient as you like, it just depends on your taste.  However, since these are parmesan garlic wings, you'll want lots of parmesan...

And lots of garlic...

Next, melt some butter in a bowl.  Add the parmesan, garlic, lemon zest, oregano, basil, salt, and pepper.  Mix it all up!  Add a little olive oil to thin it out a bit too.

Now that the sauce is ready, it is time to bread the chicken.  Wash and dry the chicken.  Since my wife prefers a thin breading, I just dip the chicken directly in the flour mixture.  If you prefer a thicker crunch batter, dip the chicken in a milk/egg wash prior to putting in the flour.

Repeat with all wings until they are all coated. While doing this, start heating some canola oil on the stove.

Next, cook the wings!  Once the oil really starts to bubble, its hot enough to add the wings.

Cook the wings in more than one batch if necessary. You don't want to crowd the wings in the pan.

Remove the wings from grease and dry on a paper towel.  Cut one open to make sure it is cooked thoroughly.

Then dip the wings in the sauce and move to a plate to dry.

Repeat with all wings.

Serve with potato skins and a beer!


Salted Caramel & Salted Hot Fudge Thumbprint Cookies


Back by popular demand.  Salted caramel and salted hot fudge thumbprint cookies.  Everyone loves these!!

First, you will need to make the cookie dough.  I was so excited about making the cookies that I didn't do the best job with taking photos.


Start by creaming together 1 cup of butter and 1 1/2 cups of sugar.
Next, mix 3 1/2 cups of gluten free flour or regular flour with 1 1/2 teaspoons baking powder and 1/4 teaspoon salt.

To the butter/sugar mixture, add 2 eggs and 1 1/2 teaspoons vanilla.  Then add the flour mixture.  Stir until combined.  Separate into several small pieces of dough and wrap in plastic wrap.  These will need to go into the refrigerator for a while. It is best to separate the dough so that you have smaller amounts to work with.  The dough is best to work with just out of the fridge.

While the dough is in the fridge, start making the caramel.  Add 2 cups of lightly packed brown sugar to a dutch oven or other thick based pot.
Begin to cook the sugar over low heat until it begins to melt, darken in color, and starts to clump together.

Once that happens, add 12 tablespoons of butter - cut in pieces.  Cook that until the butter is melted and mixed well with the brown sugar.
Then add 1 cup of heavy cream.

Stir it together a little while longer until it is all mixed together. Also add about a tablespoon of sea salt.

Once the caramel is all blended and there are no sugary clumps left in it, pour it into a jar for use with the cookies.


Next make hot fudge.
Here are the ingredients:

I got so excited about the idea of hot fudge that I completley forgot to take any pictures.   Perhaps I'll go back and edit this to add photos the next time I make these cookies. For now, you'll have to use your imagination.

Mix 2/3 cup heavy whipping cream, 1/2 cup light corn syrup, 1/3 cup packed brown sugar, 1/4 cup unsweetened cocoa powder,  and 3 ounces of bittersweet chocolate in the dutch oven or heavy pot.  It is important that whatever you are cooking it in is thick so it reduces the chances of it burning!  Cook on low for ten minutes.  Then turn off the heat and add an additional 3 ounces of bittersweet chocolate chips, 1/4 teaspoon of salt, 2 tablespoons of butter, and 1 teaspoon of vanilla. Stir until combined.


Once the toppings are ready, turn on the oven to 350 degrees.

Roll out small balls of dough about nickel sized.

Cook for about 15 minutes.
Once removed from the oven, immediately use the back of a tablespoon to push small indentations in each cookie.  Or you could use your thumb as the name of the cookies imply.  But these suckers are hot so I recommend the tablespoon!


Slide the cookies onto a piece of aluminum foil on the counter.

Fill with toppings.  Caramel.....

And hot fudge....

Then sprinkle the cookies with sea salt.
Move to plate/platter and serve!  Or store in fridge and eat later.  Though you'll have to eat at least one now.  They are too good to wait.